GMCnet 9/5/2010
I just did this modification. (And it is a good modification.)
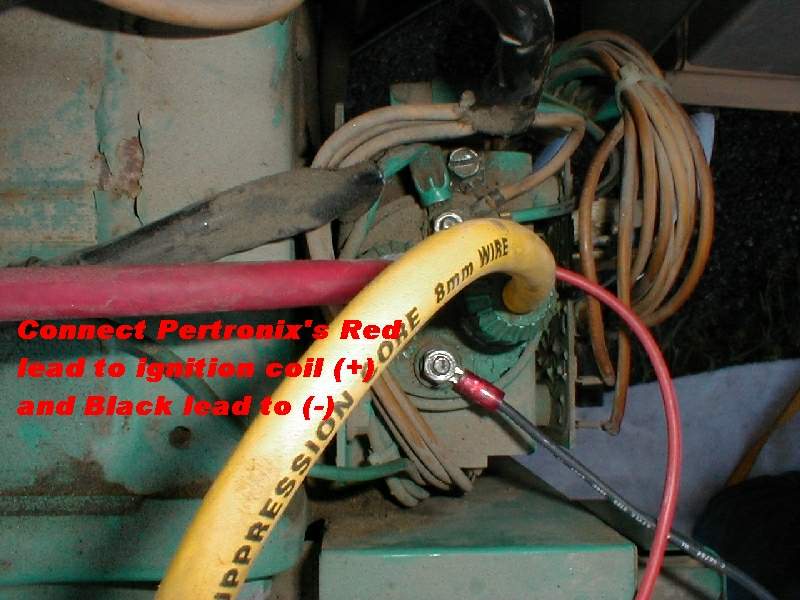
Disconnect the points from the coil and tie it up out of the way. (Yes, it should have been on the negative side.) Connect the module across the coil. Red(+)/Black(-)
There are a couple of different modules (and MANY more mounting brackets) used in different applications. they all SHOULD work As long as it uses a magnet and the module is for a negative ground. (I think there is a way to use the "lobe sensor" style but as they cost more, I do not see the need.)
You have to have the magnet pass close to the same side of the module as in the intended application. Normally it will be the opposite corner from the mounting tab on the module. (Look at the instructions that came with the module.) They normally have a yellow dot to mark the corner with the sensitive area. But IIRC, the mark itself, is NOT on the sensitive area! It is on the side NEXT to the sweet spot.
NOTE 1: The yellow mark may not be accurate enough for setting the timing.
NOTE 2: If you have a different module, it might require a different bracket from the pictures posted on the web.
NOTE 3: Be careful not to touch the black lead to any positive source. My first one touched the positive side of the starter and blew the module right into the trash can! (I let the smoke out.)
I did not ground any of the spark leads when testing. I put spark plugs on the leads and had them on top. Moving the magnet next to the sensitive are would spark both plugs. I understand the orientation of pole of the magnet is important. I stuck it to the fly wheel, checked it, then glued it on the way that worked. I glued it a little "tall" on the fly wheel to ensure clearance of the other fins on the fly wheel.
Mike Miller
bdub
No portion of this page, text, images or code, may be copied, reproduced,
published or distributed in any medium without the expressed written permission
of the copyright holder.